Importing Refund Data lets you align your internal Ecommerce reporting with Analytics.
To use this feature, your property must be using the Enhanced Ecommerce plugin.
Transactions may only be refunded in Analytics within 6 months of the original reported transaction date. Transactions must have been sent in the new Enhanced Ecommerce format. If you are using filters to modify the transaction ID, send the refund with the original unfiltered transaction ID.
You cannot delete or modify refund data once it has been uploaded to your Analytics account. You bear sole responsibility for validating the accuracy of your refund data prior to sending it or uploading it to Analytics.
Scenario:
You are an ecommerce clothing retailer and you want to import refund data so you can analyze the impact to your business with the Analytics Enhanced Ecommerce reports.
Step One: Decide what data to import
You maintain a data file outside of Analytics that associates each clothing product with any refunds issued for that product.
Step Two: Create the Data Set
In order to process refunds you need to have collected transaction data with the ec.js plugin.
- Sign in to Google Analytics.
- Click Admin, and navigate to the property in which you want to upload data.
- In the PROPERTY column, click Data Import.
- Click New Data Set.
- Select Refund Data as the Type.
- Name the Data Set: “Refunds”
- Define the Schema using the example below as a model.
Schema Example
Transaction Id is set as the default Key.
Schema Settings:
Key: Transaction Id
Dimension: Product SKU
Metrics: Product Price, Quantity Refunded, Revenue
Save the data set.
Step Three: Create the CSV
Generating your upload CSV file is a 2-step process:
1. Get the header for the CSV
In the Data Set table, click Refunds to open the data-set configuration.
Click Get schema.
You’ll see something similar to the following:
CSV header
ga:transactionId,ga:productSku,ga:productPrice,ga:quantityRefunded,ga:transactionRevenue
This is the header you should use as the first line of your uploaded CSV files. The table below identifies the columns:
| Transaction | Product SKU | Price | Quantity Refunded | Transaction Revenue |
| ga:transactionId | ga:productSku | ga:productPrice | ga:quantityRefunded | ga:transactionRevenue |
2. Create a spreadsheet and export it as a CSV
Create a Google spreadsheet that follows the format above. The first (header) row of your spreadsheet should use the internal dimension names (e.g., ga:transactionId instead of Transaction) provided in the Get schema dialog as shown above. The columns beneath each header cell should include the corresponding data for each header.
| ga:transactionId | ga:productSku | ga:productPrice | ga:quantityRefunded | ga:transactionRevenue |
|---|---|---|---|---|
| T00001 | 12345 | 11.99 | 1 | 11.99 |
| T00002 | 23456 | 11.99 | 2 | 23.98 |
| T00003 | 34567 | 11.99 | 3 | 35.97 |
| T00004 | 45678 | 11.99 | 4 | 47.96 |
Export the spreadsheet as a CSV. Your file will look something like this:
    ga:transactionId,ga:productSku,ga:productPrice,ga:quantityRefunded,ga:transactionRevenue
    T00001,12345,11.99,1,11.99
    T00002,23456,11.99,2,23.98
    T00003,34567,11.99,3,35.97
    T00004,45678,11.99,4,47.96
Full vs. Partial refunds
You cannot mix full refunds and partial refunds in the same upload file. Use different upload files for each refund type.
If you want to refund an entire transaction, each row of your upload file should include only the Transaction ID:
| ga:transactionId | ga:productSku | ga:productPrice | ga:quantityRefunded | ga:transactionRevenue |
|---|---|---|---|---|
| T00001 |
If you want to refund a partial transaction, each row of your upload file should include the Transaction ID, Product SKU, and Quantity Refunded:
| ga:transactionId | ga:productSku | ga:productPrice | ga:quantityRefunded | ga:transactionRevenue |
|---|---|---|---|---|
| T00001 | 12345 | 1 |
Step Four: Upload the data
You can now upload the CSV file you created to Analytics. You have two choices for uploading your data: manually, using the Analytics user interface, or programmatically, using the Management API.
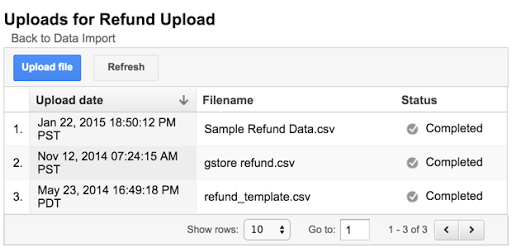
Upload manually- In the Data Set table, find the row for Refunds.
- Click Manage uploads for the Refunds data set.
- Click Upload file, select the file, then click Upload.

- Sign in to Google Analytics.
- Click Admin, and navigate to the property in which you want to upload data.
- In the PROPERTY column, click Data Import.
- In the list, click the data-set name.
- Click Get Custom Data Source ID…
- Make a copy of the ID.
- Follow these instructions to upload via the Management API.
Step Five: See the data in reports
Once you've uploaded refund data, you can see it in the Sales Performance report.
You can also create a Custom Report with any of the refund metrics (e.g., Local Product Refund Amount, Local Refund Amount, Product Refunds, Product Refund Amount, Quantity Refunded, Refund Amount), and then add any of the available dimensions.
Uploaded data needs to be processed and joined with your existing data. It may take up to 24 hours before the imported data appears in reports.