[Video](https://www.youtube.com/watch?v=ajkifYNBuBI)
Ad inspector supports the following tests:
- **In-context testing**: load ads from the ad units in your app. You can open ad inspector to view details on requests made from ad units.
- **Out-of-context testing**: test your ad unit directly in ad inspector without navigating to your app's UI. You can test multiple ad units at once, asynchronously load and view your test ad requests, and perform single ad source tests.
When running an out-of-context test, your requests don't carry the parameters
to run in your app's UI, including child-directed treatment configuration,
custom targeting, network extras, and different sizes. Due to the limitation of
these requests, we recommend you use in-context testing in your app's UI.
## Prerequisites
Before you continue, do the following:
- Complete all items in the initial [Prerequisites](https://developers.google.com/ad-manager/mobile-ads-sdk/flutter/ad-inspector.md.txt#prerequisites) to create an Ad Manager account, set your test device, initialize Google Mobile Ads Flutter Plugin, and install the latest version.
- [Launch ad inspector](https://developers.google.com/ad-manager/mobile-ads-sdk/flutter/ad-inspector/launch-ad-inspector.md.txt).
## Request a test ad
To request a test ad in ad inspector, complete the following steps. For more
details, see
[Ad inspector](https://support.google.com/admanager/answer/7180401#ad-inspector).
- **In-context**:
1. On a test device, navigate to your app's UI and load an ad.
2. Open ad inspector. In the **Ad unit** tab, find the ad unit where you loaded the ad.
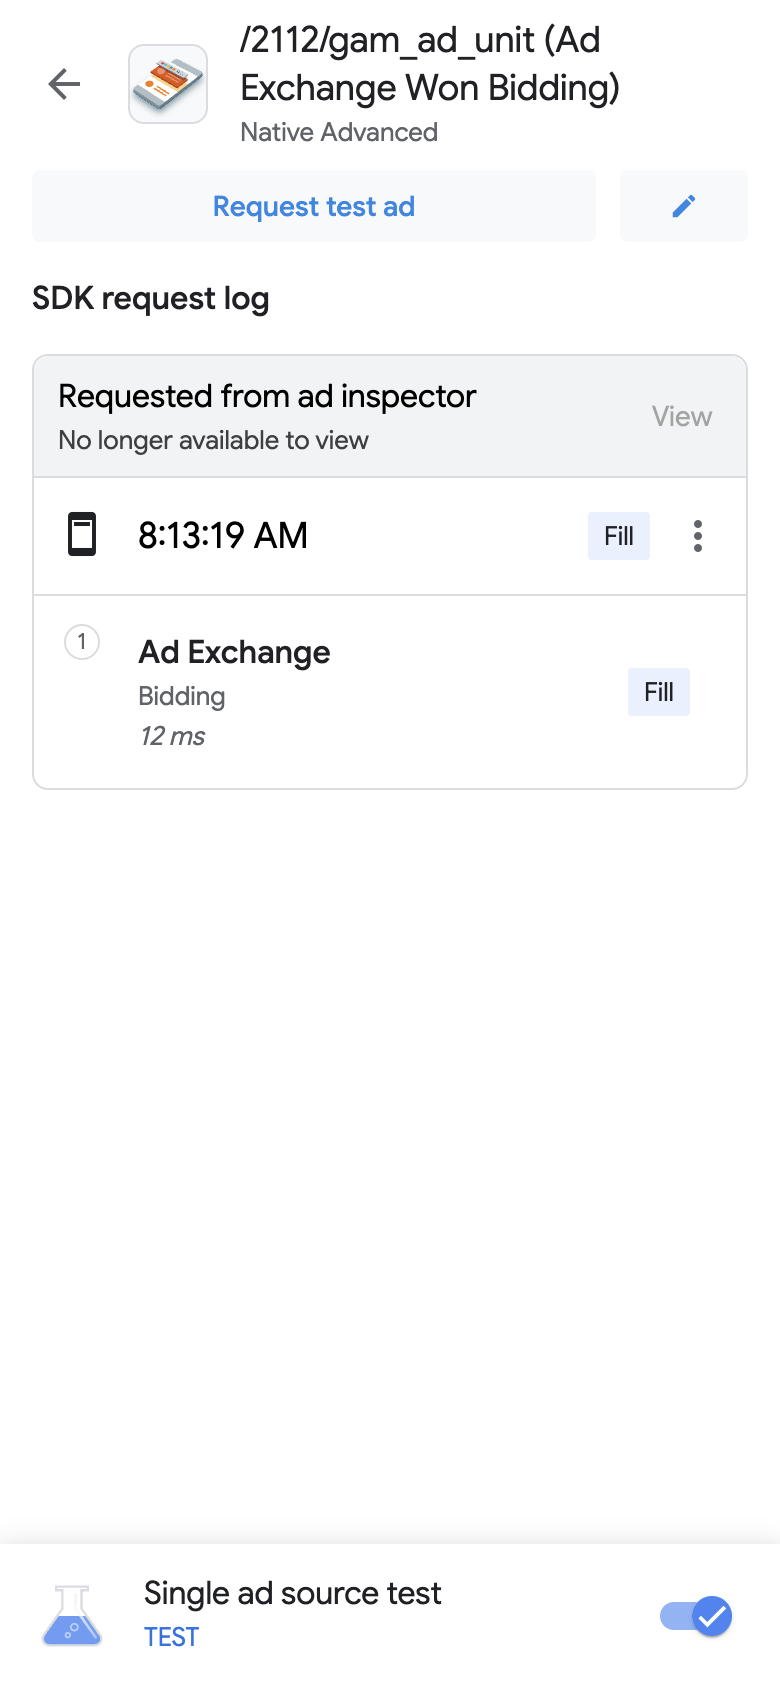
3. In **SDK request log**, view details on your requested test ad.
- **Out-of-context**:
1. In the **Ad unit** tab, tap on your ad unit and click **Request test ad**.
2. In **SDK request log**, view details on your requested test ad.

If the ad unit format shows **Unknown** , you see **Request test ad** greyed
out. If you request multiple formats for
a single ad unit, ad inspector uses the last ad unit.
### Customize a test ad
Ad inspector lets you build a custom test ad through the **Configure custom
ad request** page. This page contains parameters you use to define and request
a custom test ad. To request a test ad with default settings, follow
[Request a test ad](https://developers.google.com/ad-manager/mobile-ads-sdk/flutter/ad-inspector/test-ad-units.md.txt#request_a_test_ad).
To build a custom test ad, do the following:
1. In the **Ad unit** tab, tap on the ad unit you want to build a custom test ad.
2. Click
edit**Edit**:
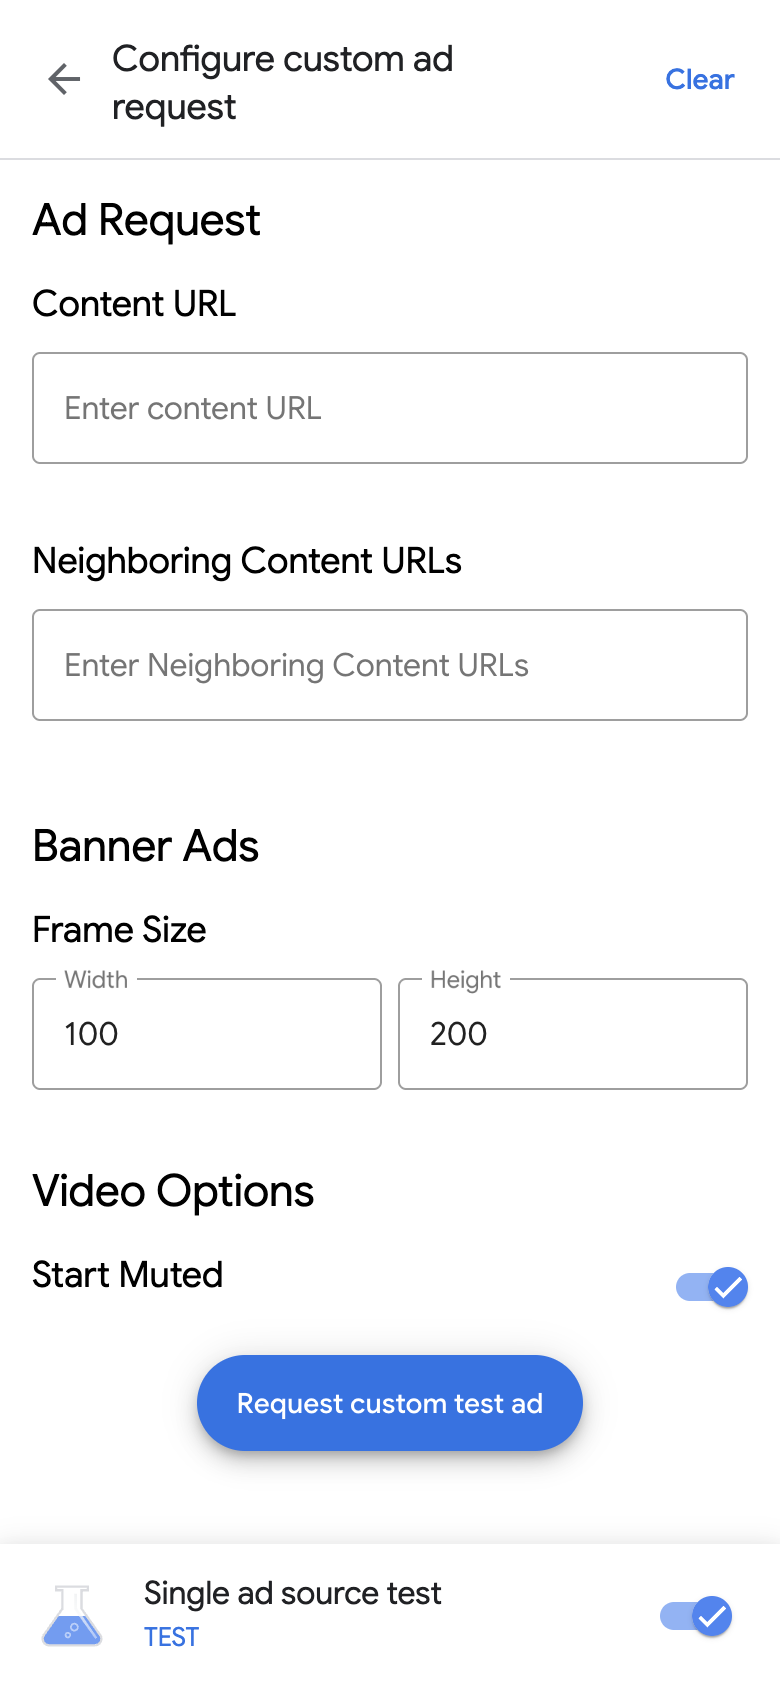
The **Configure custom ad request** page appears. The following example
shows the **Configure custom ad request** page for a banner ad:
3. Input your ad request and details into the following fields:
- **Ad Request** :
- **Content URL** : the URL of the surrounding content. For details, see [Content URL](https://developers.google.com/ad-manager/mobile-ads-sdk/flutter/targeting.md.txt#content_url).
- **Neighboring Content URLs** : the URL of the content that appears before and after an ad. For details, see [Content mapping for apps](https://support.google.com/admanager/answer/11050896).
- **Category Exclusions**: blocks ads from specific advertisers, brands, or categories.
- **Publisher Provided ID** : set an identifier in frequency capping and audience-based ad delivery controls across devices. For details, see [Publisher provided
identifiers](https://developers.google.com/ad-manager/mobile-ads-sdk/flutter/targeting#publisher_provided_identifiers).
- Depending on the ad format, input the following ad details:
- **Banner Ads** : enter the width and height of the ad. For details, see [Banner ads](https://developers.google.com/ad-manager/mobile-ads-sdk/flutter/banner.md.txt).
- **Native Ads** :
- **Media Aspect Ratio**: select your preferred media aspect ratio.
- **Disable Image Loading** : defines whether Google Mobile Ads Flutter Plugin must load image asset content.
- **Custom Mute This Ad**: defines whether to use the custom mute this ad feature.
- **Preferred Ad Choices Position**: indicates the preferred location of the AdChoices icon.
- **Video Options**:
- **Start Muted**: a toggle to mute your content on start.
- **Click to Expand Requested**: defines whether the requested video must have the click to expand behavior.
> [!NOTE]
> **Note:** If the ad server doesn't return a video ad, video options are not applied.
4. Click **Request custom test ad** . If successful, you see the custom test ad
in **SDK request log**.
> [!NOTE]
> **Note:** For each ad unit, ad inspector saves the custom test ad settings of your latest customized ad request.
## Test a single ad source
Ad inspector can restrict ad requests in your app to serve ads from a single
bidding or waterfall ad source. This approach lets you verify that you've
correctly integrated with the third-party adapter, and the ad source serves
as expected.
To test a single ad source, complete the following steps:
1. In **Ad inspector** , click the **Single ad source test** toggle. A
**Single ad source test** dialog appears:


2. Select an ad source to test. Afterwards, you receive the
**Force restart app** page:

The single ad source test setting applies to any future ad requests you make.
This test doesn't apply to previously cached ads in that session.
We recommend you to force restarting your app when applying a single ad source
test. This approach invalidates cached ads that might display instead of
your chosen ad source receiving a request.
After restarting your app, all ad unit placements attempt to show an ad from the
selected ad source. Launching ad inspector when a single ad source test is
active shows the active test ad source:

In single ad source test mode, all ad requests attempt to fill with the
selected ad source, regardless of whether that ad source was configured for
bidding or waterfall. If the ad source you're testing is not set up for bidding
or waterfall for the ad unit, you receive the following error message:
Ad Unit has no applicable adapter for single ad source testing on network: AD_SOURCE_ADAPTER_CLASS_NAME
To verify whether the ad source filled the ad requests after you start a single
ad source test, tap an ad unit to view the SDK request log. If the ad source
failed to load an ad, an error message appears describing the error, such
as `Adapter failed to initialize`.
If you've added multiple instances of the selected ad source to a waterfall, you
see each call instance to the ad source. This process renders until the ad is
either filled or the waterfall ends without a fill.
## Stop a single ad source test
To stop the test, complete the following steps:
1. In **Ad inspector** , click off the **Single ad source test** toggle. The **Stop single ad source test?** dialog appears.
2. Tap **Stop test**.

If successful, a confirmation message appears over **Force restart app**:

To revoke cached ads for the tested ad source, we recommend you to force
restart the app after stopping the test.