
Testing your Action with users gives you the opportunity to get early feedback and fix any technical or user experience issues before you release it widely.
The Actions console supports release environments so that you can give a limited set of users access to test a new Action, or newer version of your existing Action, before deploying it to the public.
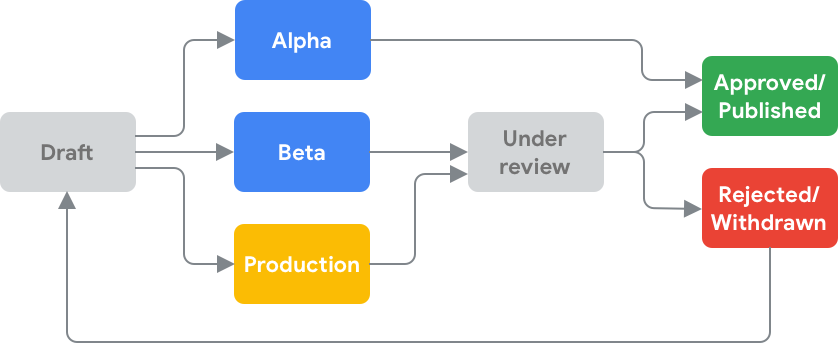
Lifecycle of a release
The following diagram shows potential paths the lifecycle of an Action can take:
There are two types of pre-production release environments that the Actions console supports:
Alpha: This channel should be used to quickly test early versions of your Action.
- Lets you distribute your Action to a small set of users without going through a full Google review.
- Users are given warnings that the Action hasn't undergone a Google review for policy compliance.
- Ideal for internal testing.
Beta: This channel lets you distribute an Action to a limited set of users after passing a full Google review.
- You should use this channel to give users outside your organization access to early versions of the Action.
- Users will be informed that the Action is a preview version.
- Since the beta version has passed Google review, you can elect to make it public at any time without another review by Google.
Release environment comparison
The table below summarizes the differences between deployment channels.
| Simulator | Alpha | Beta | Production | |
|---|---|---|---|---|
| Intended audience | Developer only | Early testers within your team, friends, and family | Testers outside of your team | All Google Assistant users |
| Requires Google Review | No | No | Yes | Yes |
| Who has access | Developer only | Developer-defined list of users. Users must opt in. | Developer-defined list of users. Users must opt in. | Publicly available to all Google Assistant users |
| Max # of users | 1 | 20 | 200 | N/A |
| Where available | Simulator and all Assistant devices | All Assistant devices | All Assistant devices | All Assistant devices |
| Actions Builder | Supported | Supported | Supported | Yes |
| Actions SDK | Supported | Supported | Supported | Yes |
| Dialogflow | Supported | Supported | Supported | Yes |
| Smart Home | Supported (requires account linking) | Not supported | Not supported | Yes |
| Templates | Supported | Not supported | Not supported | Yes |
| Explicit invocation | Supported | Supported | Supported | Yes |
| Implicit invocation | Supported | Supported | Supported | Yes |
| Account linking | Supported | Supported | Supported | Yes |
Manage tests for alpha or beta release
To set up your testing for alpha or beta, follow these steps:
- Click either Manage Alpha testers or Manage Beta testers.
Type in the email addresses for the testers, separated by commas. You can specify up to 20 testers for alpha testing and up to 200 testers for beta testing.
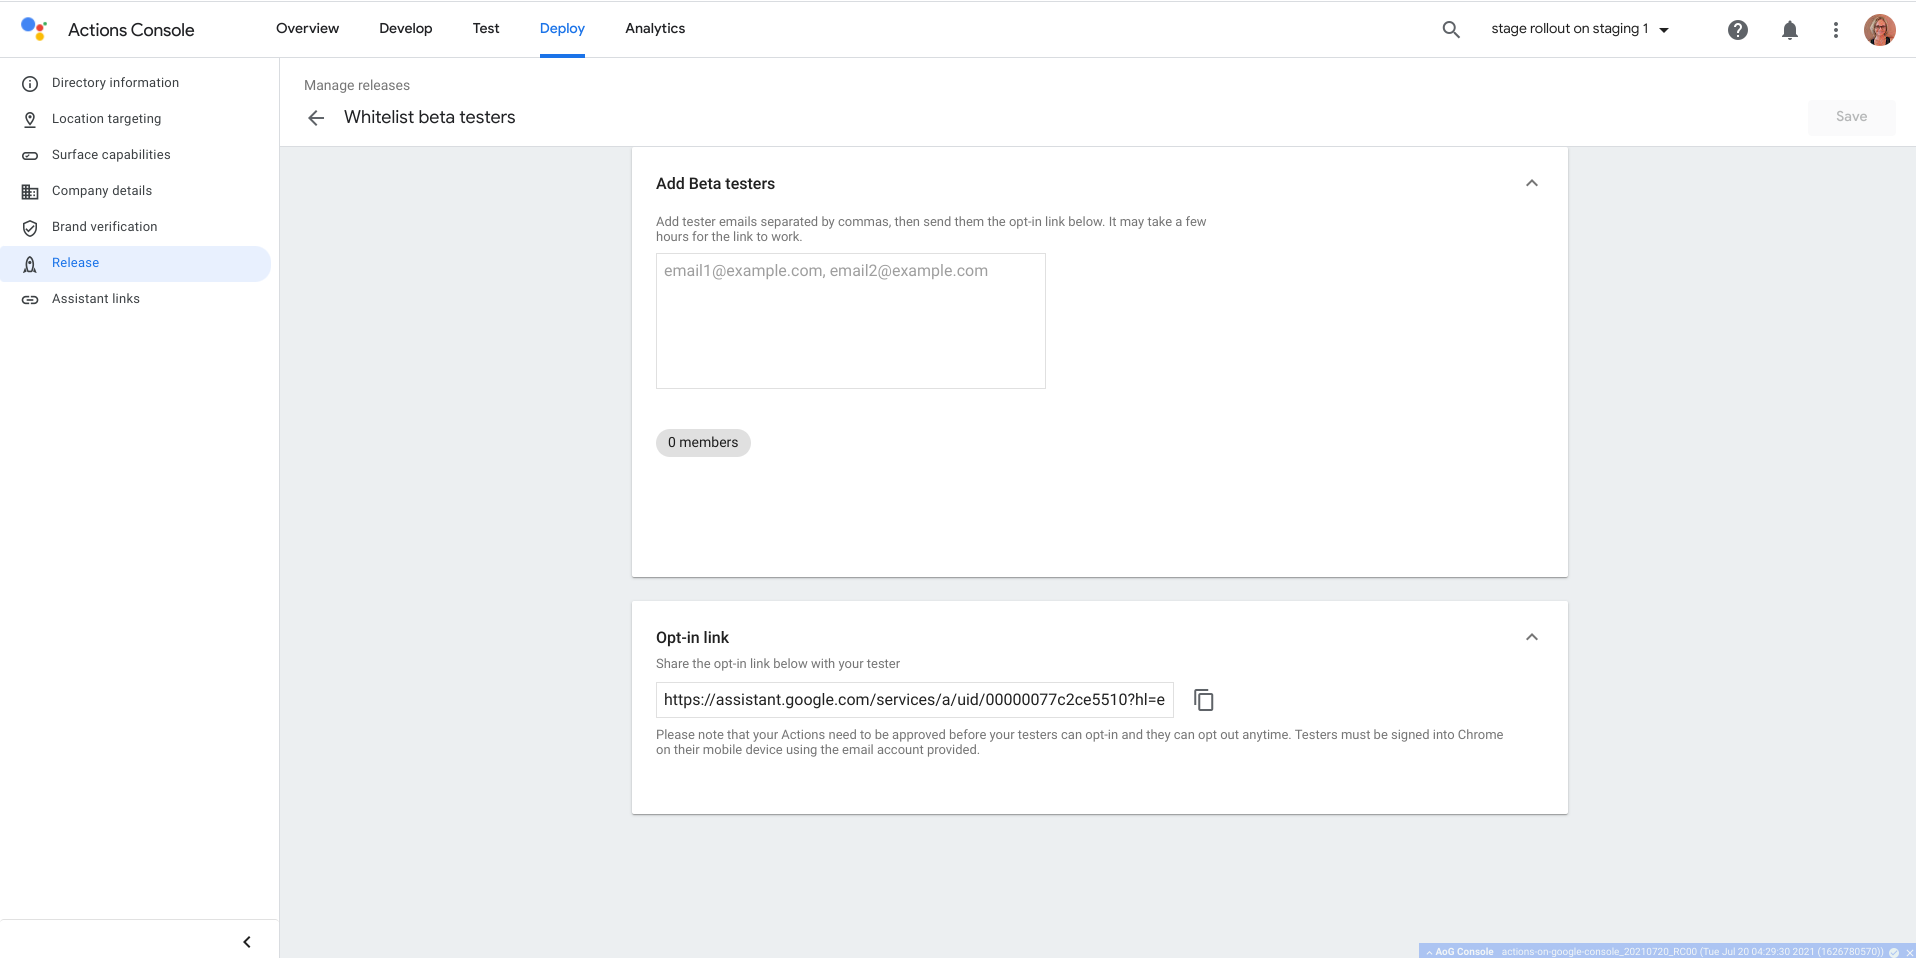
Copy the Opt-in link to share with your testers.
Click Save.
You should send an invitation email to your testers with a link to the alpha or beta version of your Action (the opt-in link). To learn more, see Get feedback.
Opt-in link
The opt-in link represents your Action directory page and never changes. The link points testers to your directory page and see the opt-in card for the eligible environment. If you listed the same testers for alpha and beta, they are eligible for both and see an opt-in card for the alpha version first.
Implement fulfillment for an alpha or beta release
The release channel information is not included in the HTTP request from Assistant to your fulfillment. To handle release channels in your fulfillment, you should provide different fulfillment URLs (for example, one fulfillment URL for the beta and another URL for the production version of your Action).
Get feedback
Once your Action has been released to the alpha or beta release channel, you should invite your testers by sharing your opt-in link (which is the same as your Assistant directory listing).
Make sure to indicate to your testers that they must:
- Have the Google Assistant app downloaded on their mobile devices in order to perform alpha or beta testing.
- Log in to the Google Assistant app using the same account which you designated as an alpha or beta tester.
After you deploy your Action, any new testers need to wait for at least 3 hours before they can access the Action using the opt-in link.
When users click on this link, they are directed to the corresponding Action's directory page. They should click on the I'm in button at the bottom of the Action's directory page to opt in as a tester for the first time.
After the tester opts in on their phone, your Action is immediately available on all of their devices. Testers will see your Action in the My Apps section of the Google Assistant app labeled with one of these modes: Alpha, Beta, or No testing. The No testing option will serve users the Production version of your Action, if available. If there is no Production version, users will not be served with anything.
Best practices
- Make sure users can join the tests. Your testers need to have a Google account (@gmail.com) or a G Suite account to join a test.
- Choose the appropriate testing type. An alpha testing group should be small and test the least stable, experimental versions of your Actions (such as within your company or team). Use beta testing with a larger group to test stable versions of your Actions that are near release.
- Provide a channel for testers to send you feedback. Alpha and beta channels are only available to your own testers. Make sure to offer them the ability to provide feedback by email, via a website, in a message forum, or through another suitable mechanism.
- Run concurrent tests on the same action. You can run alpha and beta tests concurrently.
Known issues
- The Assistant directory for the web is not supported for opt-in to alpha or beta. Make sure your testers follow the link on their mobile devices (Android or iOS).
- Your changes may take a few hours to go live. Please hold off for an appropriate period of time before sharing the opt-in link with your users.
Create a new alpha or beta release
To deploy your Action to the alpha or beta release channel, follow these steps:
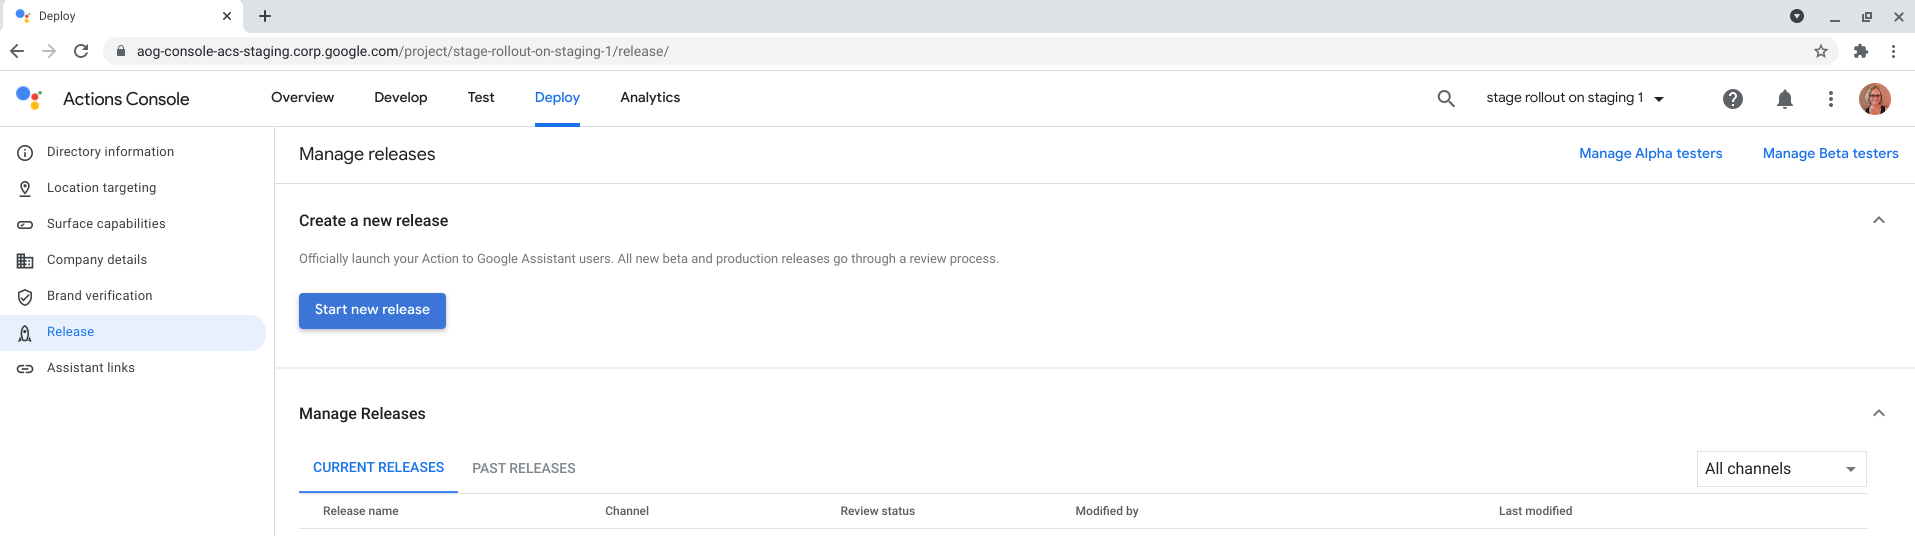
- From the Actions console, click Deploy > Release.
Click Start new release.
Select Alpha or Beta and click Submit.
If prompted, indicate that you have completed the required steps in the Action review requirements checklist.
If applicable to your project, select the languages for your release.
Click Submit.
After you submit the alpha or beta version, it appears in the Manage Releases section.
Upgrade an existing release from alpha or beta to production
Production releases can be a full rollout to all Google Assistant users, or a staged rollout to specific regions or a percentage of users. Staged rollouts help test the stability of your Action project. It's best to release to a small set of users and make gradual increases until you've reached 100% of users. This allows you to resolve bugs before rolling out to the entire user base.
Staged rollout
Staged rollouts allow developers to manage their production releases by launching to a subset of users and slowly ramping up to all users. You can gradually increase the regions or the percentage of users in your rollout.
To deploy your Action as a staged rollout, follow these steps:
- Under Manage releases, select the version to be upgraded to production rollout.
- Click Manage deployments.
- Select Deploy to Production.
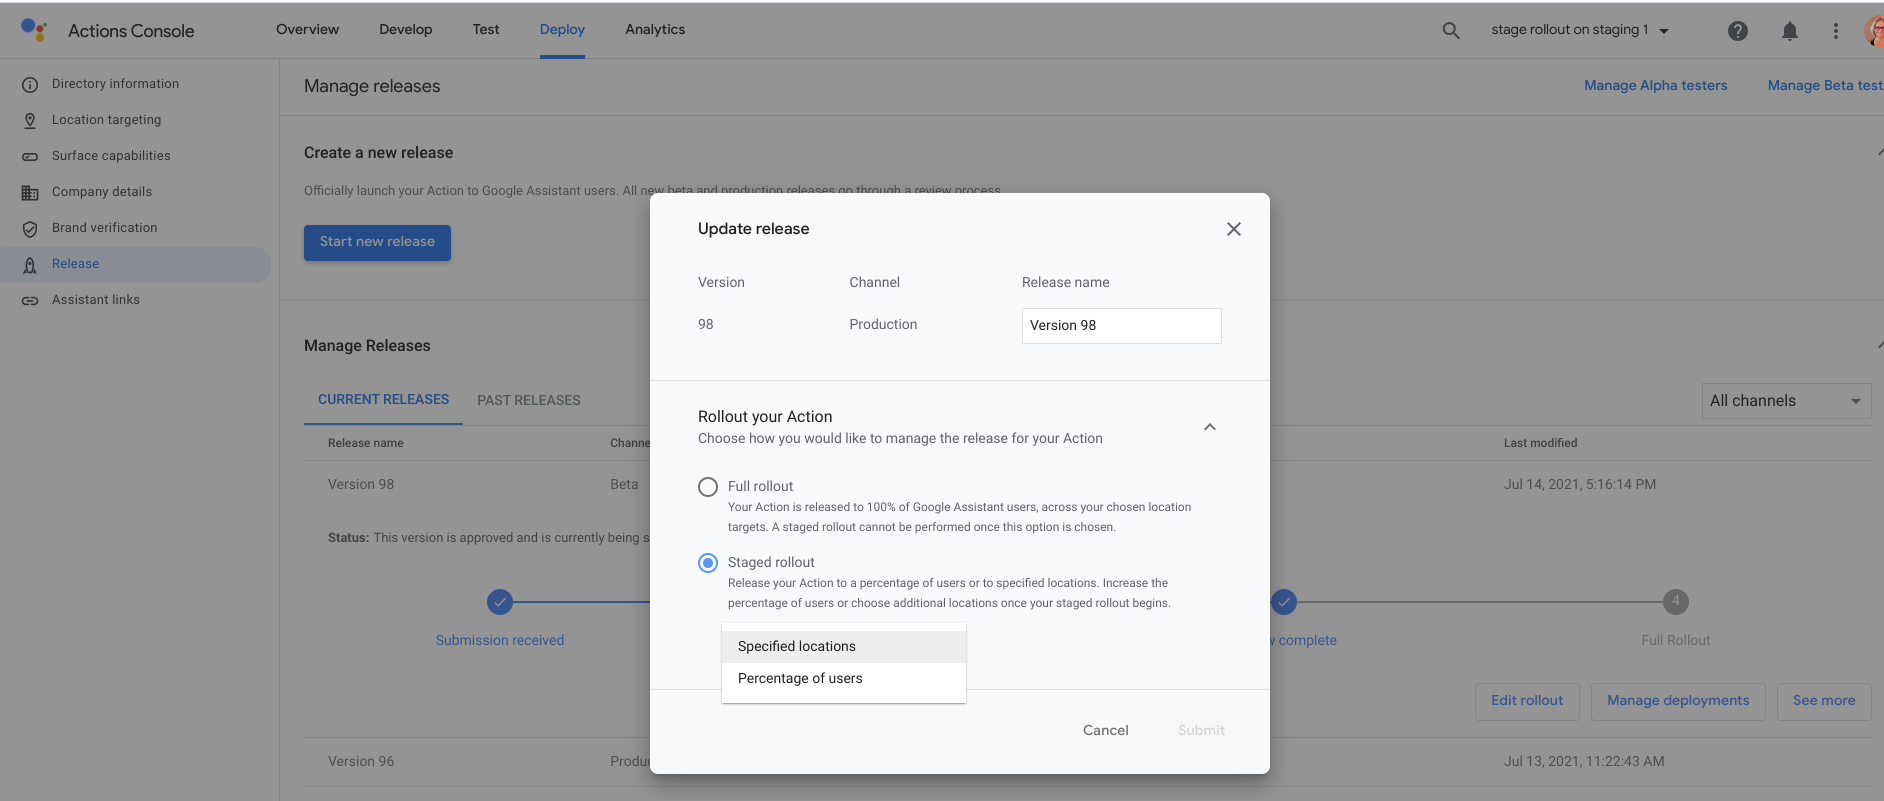
- Select Staged rollout.
- Click Select rollout type.
Select Specified locations or Percentage of users. For more information about this selection, see Rollout by specified locations or Rollout by percentage of user base.
Click Submit.
To advance the stage of your rollout, see Advance the rollout stage of a release.
Full rollout
Selecting this option releases your Action project to all users in all of your targeted countries.
To deploy your Action as a full rollout, follow these steps:
- Under Manage releases, select the version to be upgraded to production rollout.
Click Manage deployments.
Select Deploy to Production.
Select Full rollout.
Click Submit.
Create a new production release without alpha or beta testing
Production releases can be a full rollout to all Google Assistant users, or a staged rollout to specific regions or a percentage of users. Staged rollouts help test the stability of your Action project. It's best to release to a small set of users and make gradual increases until you've reached 100% of users. This allows you to resolve bugs before rolling out to the entire user base.
Staged rollout
Staged rollouts allow developers to manage their production releases by launching to a subset of users and slowly ramping up to all users. You can gradually increase the regions or the percentage of users in your rollout.
To deploy your Action as a staged rollout, follow these steps:
- From the Actions console, click Deploy > Release.
Click Start new release.
Select Production.
If prompted, indicate that you have completed the required steps in the Action review requirements checklist.
If applicable to your project, select the languages for your release.
Select Staged rollout.
Click Select rollout type.
Select Specified locations or Percentage of users. For more information about this selection, see Rollout by specified locations or Rollout by percentage of user base.
Click Submit.
Rollout by specified locations
Selecting this option releases your Action project to countries or regions you choose.
To roll out your Action by location, follow these steps:
- Click Select countries or regions and check the boxes for the regions to target for your release.
Click Submit.
Rollout by percentage of user base
This option releases your Action to a percentage of randomly selected users.
To roll out your Action to a percentage of users, follow these steps:
- Click Percentage of users.
Select the percentage of users you want to release your Action to.
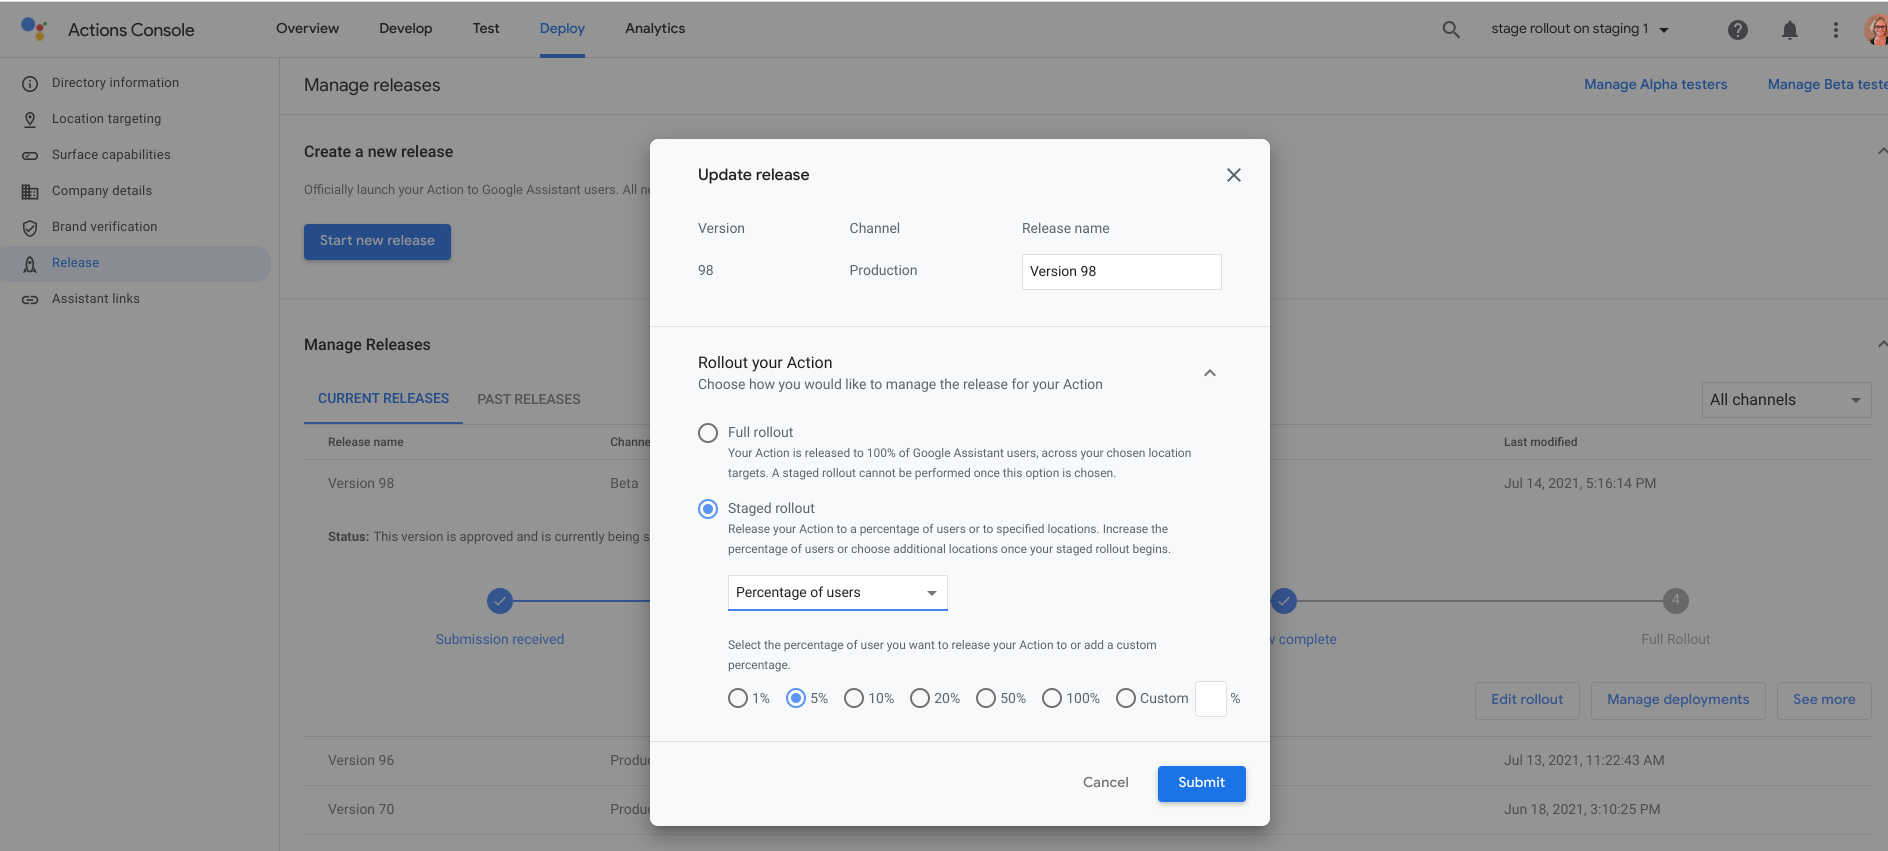
Click Submit.
Full rollout
Selecting this option releases your Action project to all users in all of your targeted countries.
To deploy your Action as a full rollout, follow these steps:
- From the Actions console, click Deploy > Release.
Click Start new release.
Select Production.
If prompted, indicate that you have completed the required steps in the Action review requirements checklist.
If applicable to your project, select the languages for your release.
Select Full rollout.
Click Submit.
After the production version is submitted, it appears in the Manage Releases section.
Edit or undeploy a release
Once you have submitted your Action to a release channel, you can still make changes. You can test the current version, withdraw the version from review, view release details, manage deployments, undeploy, and upgrade rollout stages. This is also where you can view details on past releases.
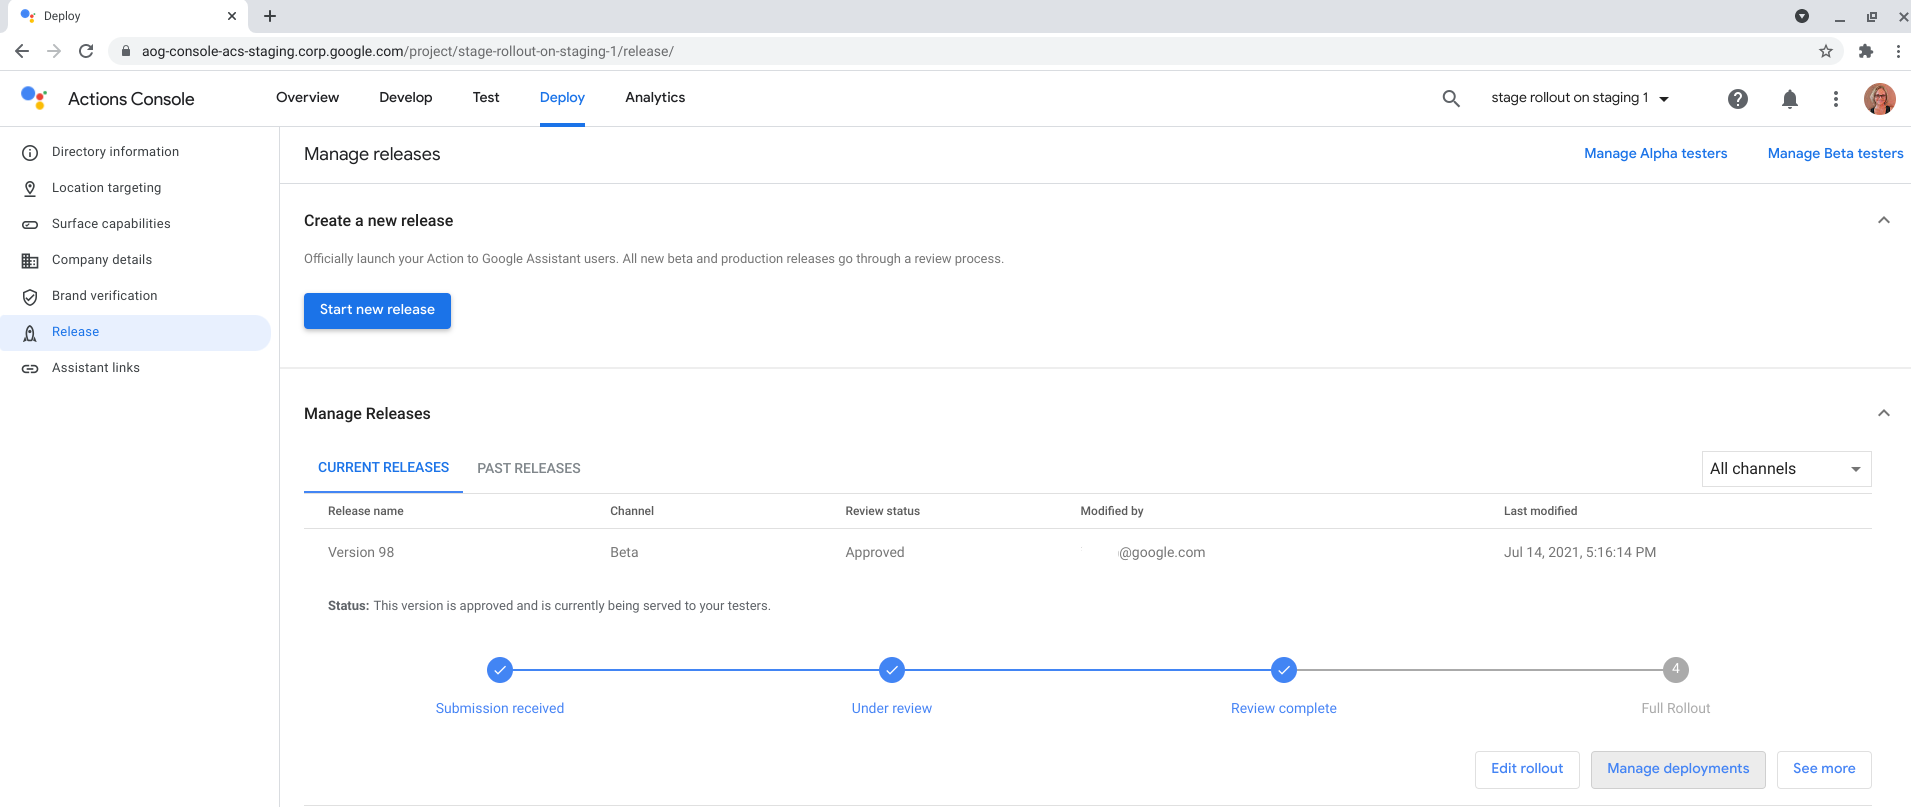
View and edit a release
To view release details, or make changes to your Action's release, follow these steps:
- Under Manage Releases, select the version under Release name.
- Choose Edit rollout, Manage deployments, or See more.
Advance the rollout stage of a release
To advance the rollout stage for your Action, follow these steps:
- Under Manage releases, select the version to be upgraded.
- Click the Edit rollout button.
- Make the changes to your rollout. For example, you may want to advance the user base from 5% to 20%.
- Click Submit.
Undeploy from production
- If you need to take your staged rollout offline, click on Edit rollout under Manage releases. You can either clear all regions or select 0%, depending on if your rollout is by location or percentage of user base.
- To undeploy an Action that is fully rolled out (100% of user base), click on the Manage deployments button under Manage releases and select Undeploy from Production.